Introduction to Command Line Interface
For this workshop (scRNAseq) there isn’t a need to go through the whole tutorial, but rather just a select set of topics.
What is the command line
- CLI is a tool into which one can type commands to perform tasks.
- The user interface that accepts the typed responses and displays the data on the screen is called a shell: bash, tcsh…
- An all-text display (most of the time your mouse doesn’t work)
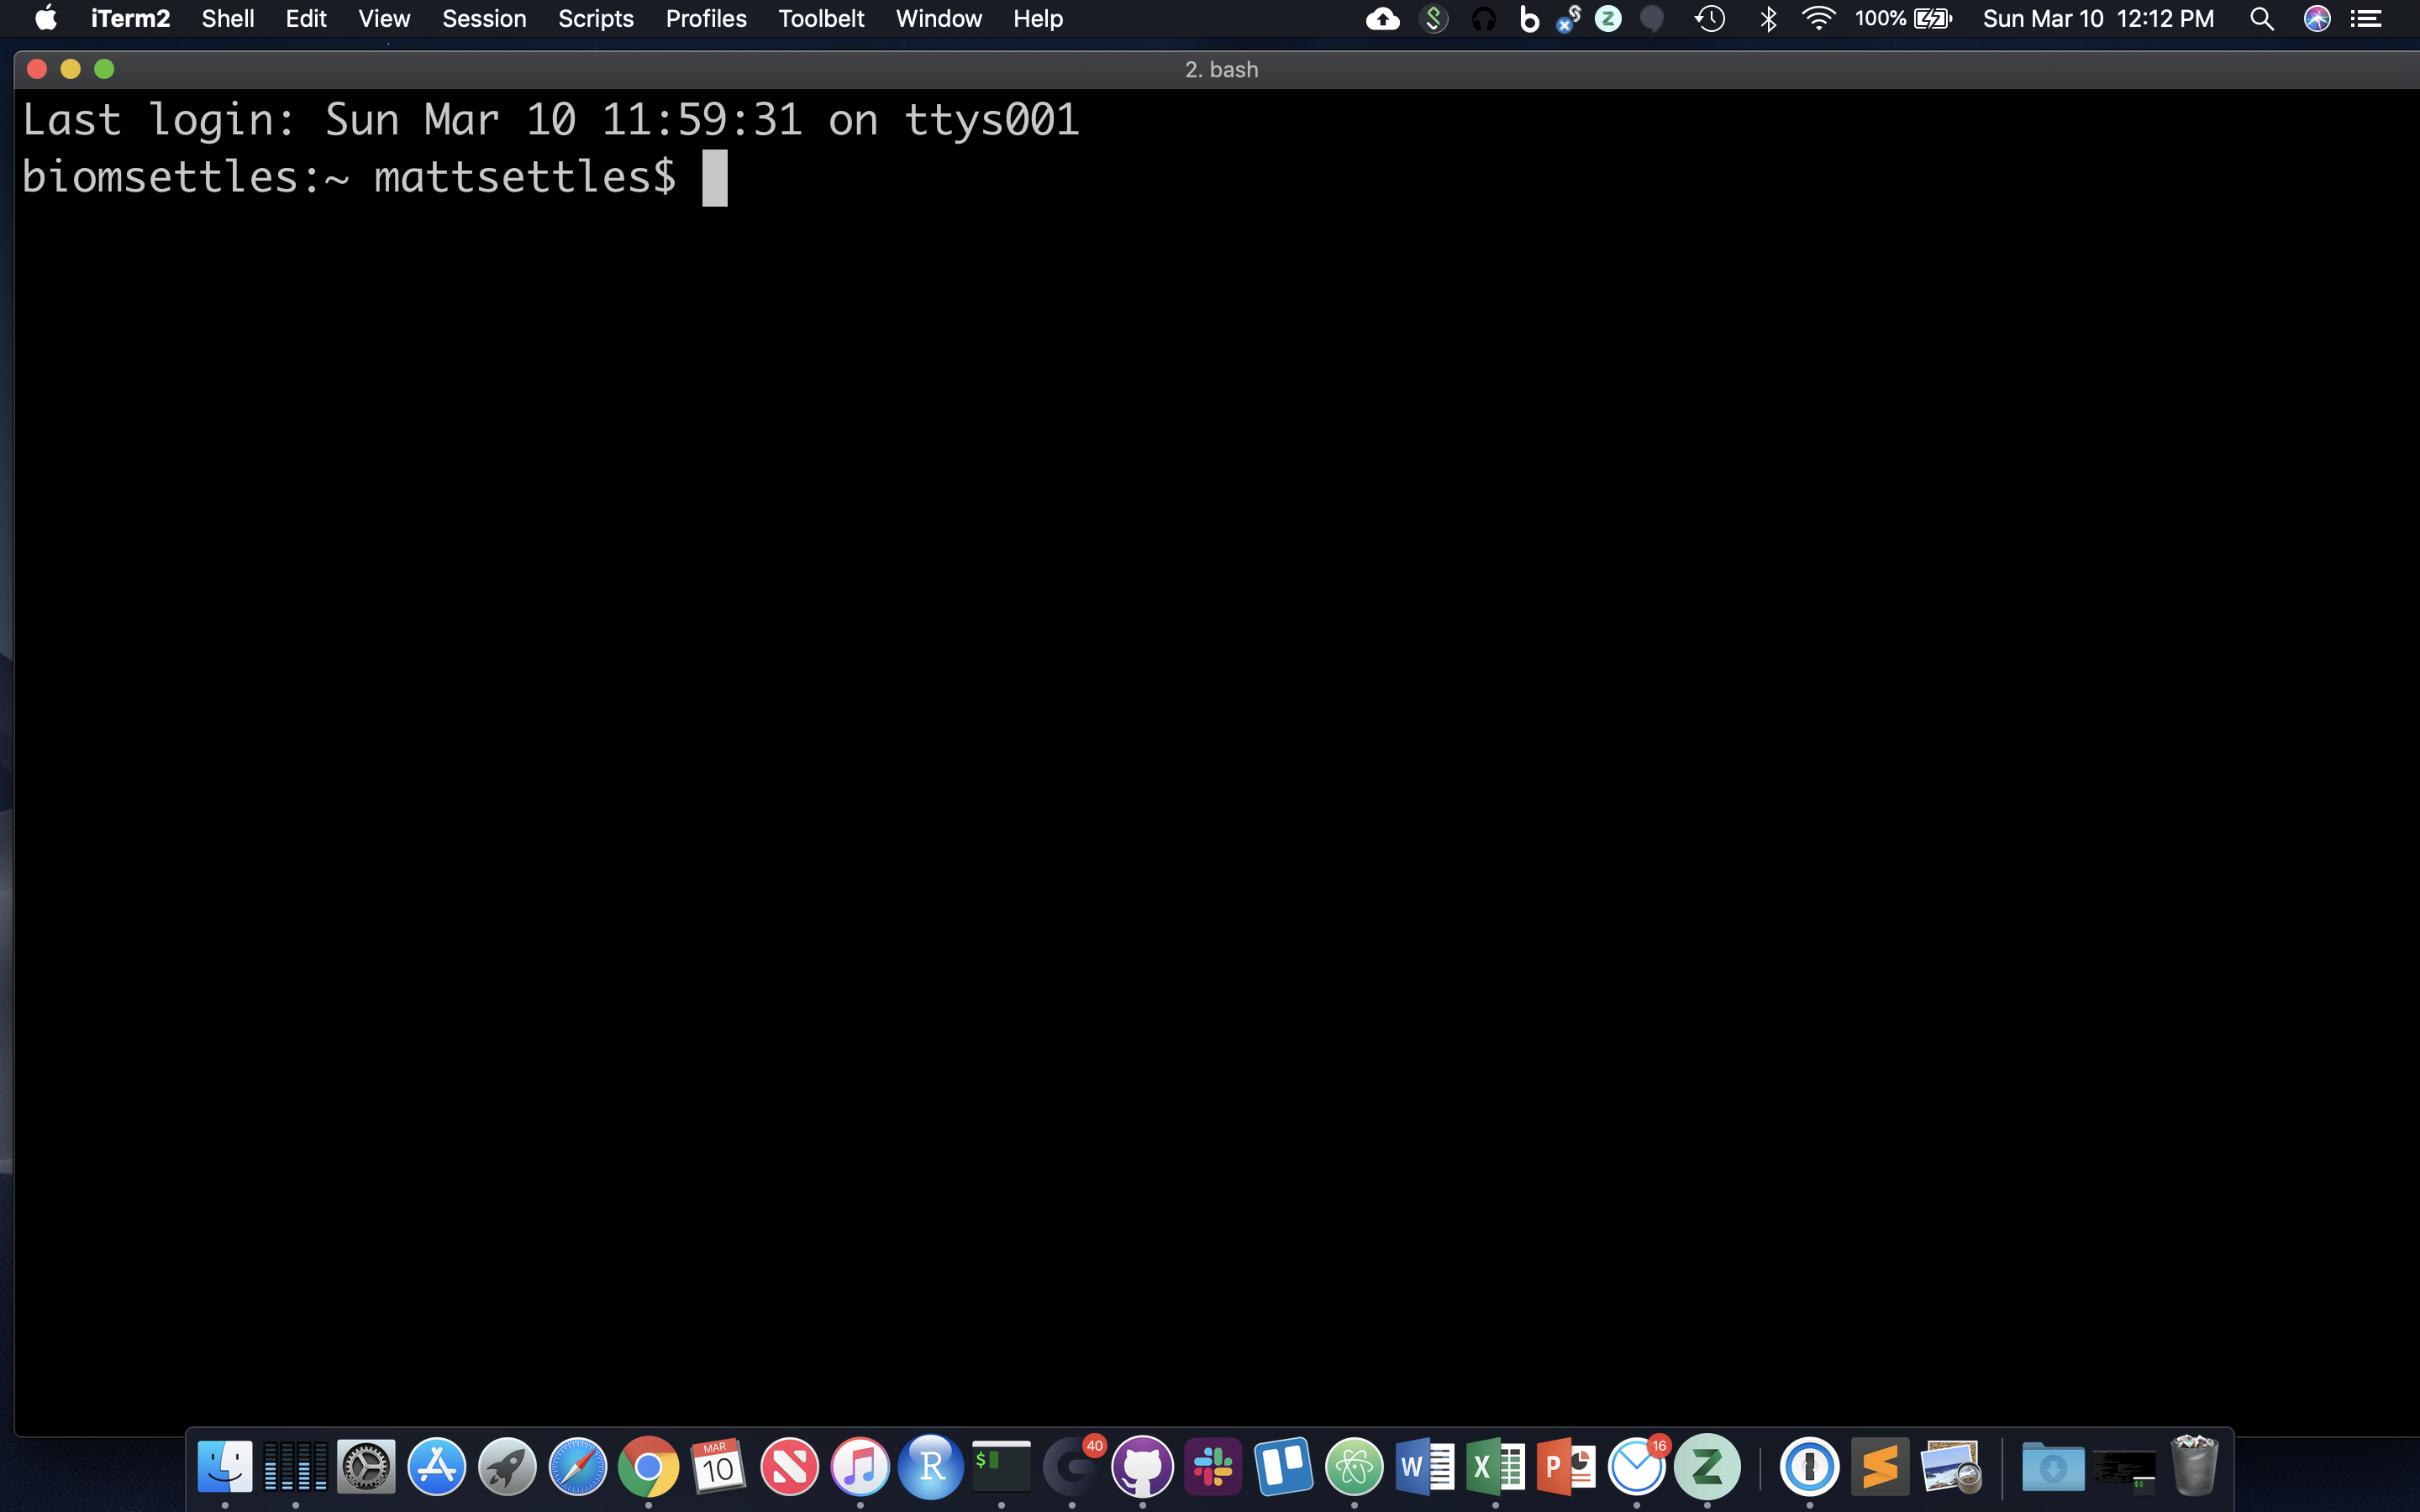
After opening, system messages are often displayed, followed by the “prompt”. A prompt is a short text message at the start of the command line and ends with ‘$’ in bash shell, commands are typed after the prompt. The prompt typically follows the form username@server:location$
a greater than sign (>) instead of a prompt means the shell is expecting more input. Can Cntr-c to cancel the operation and return to a prompt.
Directory Structure
Absolute path: always starts with ”/”
/share/workshop/msettles/cli
the folder (or file) cli in the folder msettles in the folder workship in the folder share from root.
Relative path: always relative to our current location.
a single dot (.) refers to the current directory
two dots (..) refers to the directory one level up

Usually, /home is where the user accounts reside, ie. user’s ‘home’ directory. For example, for a user that has a username of “msettles”: their home directory is /home/msettles It is the directory that a user is located after starting a new shell or logging into a remote server .
The tilde (~) is a short form of a user’s home directory.
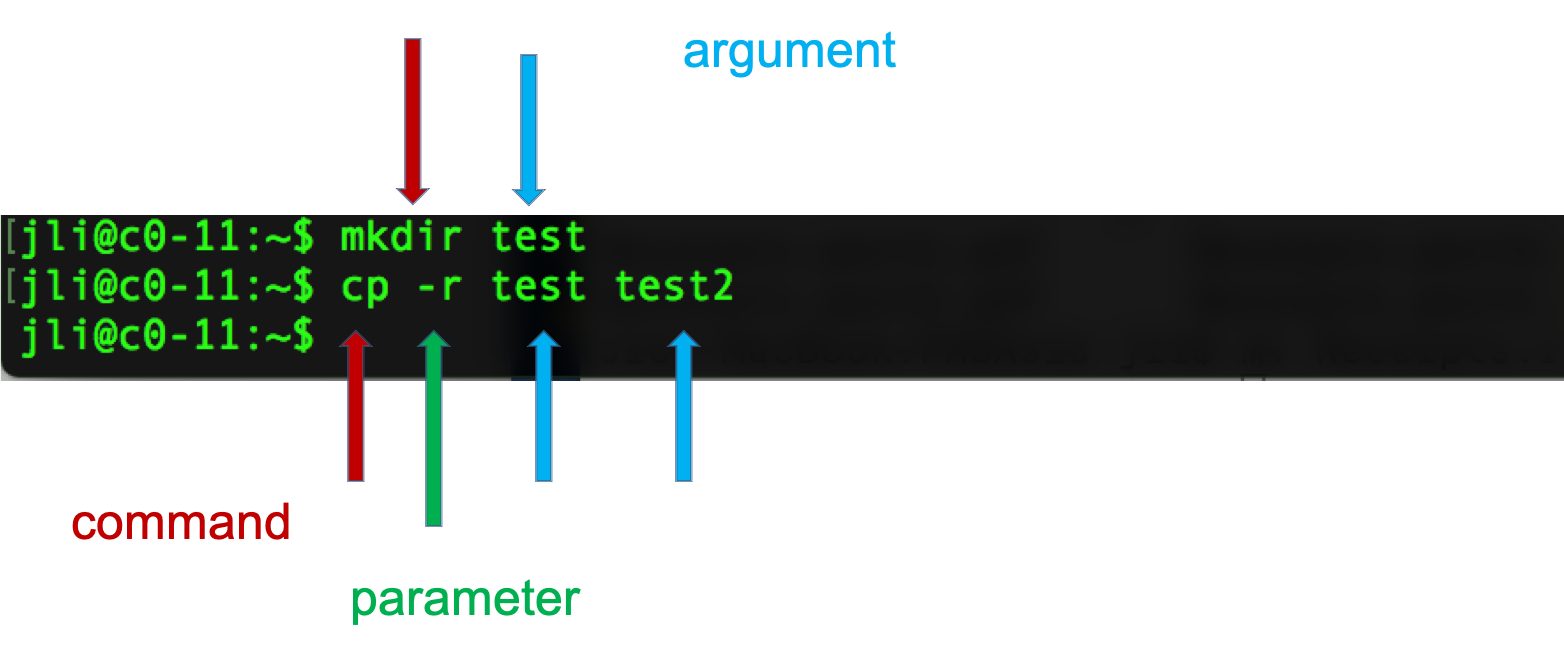
Syntax of a command
- A command plus the required parameters/arguments
- The separator used in issuing a command is space, number of spaces does not matter
Logging into a remote server
For this we use the application Secure SHell … SSH. Replace ‘username’ with your login name in the following and enter your password when prompted. You will not see your password being typed.
ssh username@tadpole.genomecenter.ucdavis.edu
for example my login is
ssh msettles@tadpole.genomecenter.ucdavis.edu
Once you’re done working on the command line, you can exit. Anything that follows the character ‘#’ is ignored.
exit # kills the current shell!

Go ahead and log back into the server.
Command Line Basics
First some basics - how to look at your surroundings.
pwd
present working directory … where am I?
ls .
list files here … you should see nothing since your homes are empty
ls /tmp/
list files somewhere else, like /tmp/
Options
Each command can act as a basic tool, or you can add ‘options’ or ‘flags’ that modify the default behavior of the tool. These flags come in the form of ‘-v’ … or, when it’s a more descriptive word, two dashes: ‘--verbose’ … that’s a common (but not universal) one that tells a tool that you want it to give you output with more detail. Sometimes, options require specifying amounts or strings, like ‘-o results.txt’ or ‘--output results.txt’ … or ‘-n 4’ or ‘--numCPUs 4’. Let’s try some, and see what the man page for the ‘list files’ command ‘ls’ is like.
ls -R /run
Lists directories and files recursively. how do I know which options do what?
man ls
Navigate like in ‘less’ (up,down,pgup,pgdn,g,G,/pattern,n,N,q), look up and try the following, if you don’t say where, it lists files in your current directory
ls -l
ls -a
ls -l -a
ls -la  # option 'smushing' ... when no values need specifying
ls -ltrha
ls -ltrha --color  # single letter (smushed) vs word options
Quick aside: what if I want to use same options repeatedly? and be lazy? You can create a shortcut to another command using ‘alias’.
alias ll='ls -lah --color'
ll
Because one of the first things that’s good to know is how to escape once you’ve started something you don’t want.
sleep 1000 # wait for 1000 seconds!
Use Ctrl-c (shows as ‘^C’ in screen) to exit (kill) a command. In some cases, a different key sequence is required (Ctrl-d).
Getting Around
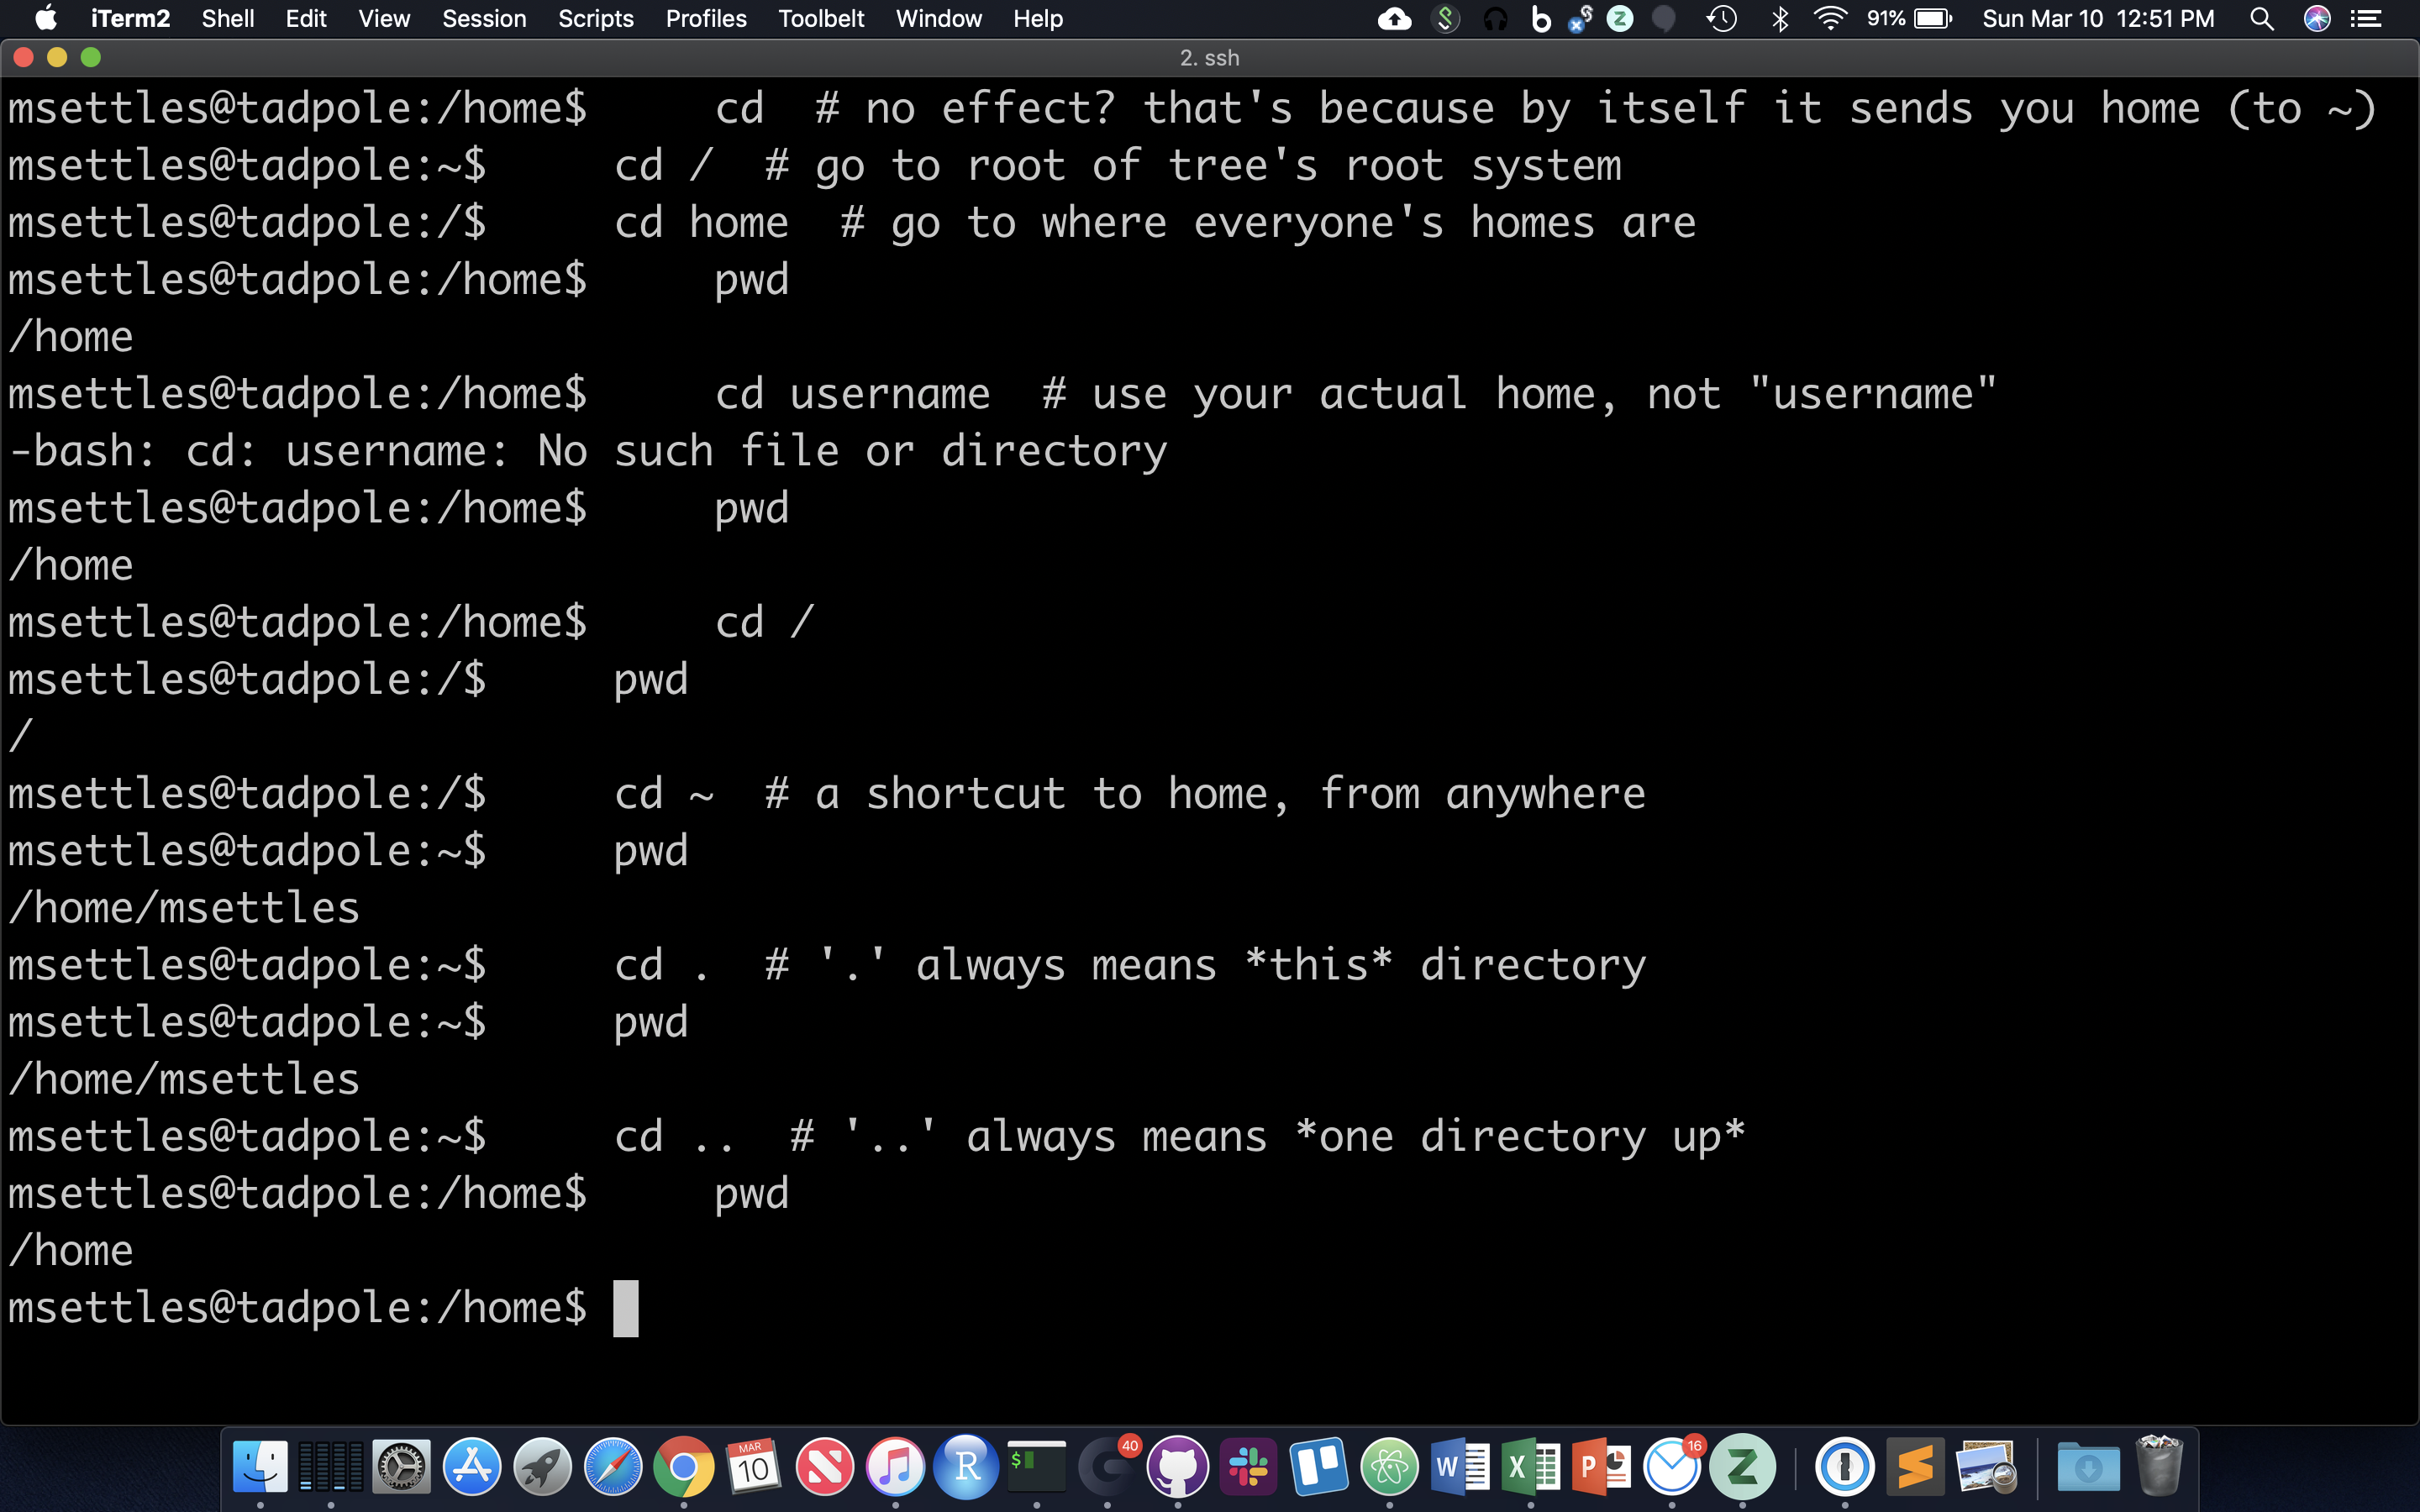
The filesystem you’re working on is like the branching root system of a tree. The top level, right at the root of the tree, is called the ‘root’ directory, specified by ‘/’ … which is the divider for directory addresses, or ‘paths’. We move around using the ‘change directory’ command, ‘cd’. The command pwd return the present working directory.
cd  # no effect? that's because by itself it sends you home (to ~)
cd /  # go to root of tree's root system
cd home  # go to where everyone's homes are
pwd
cd username  # use your actual home, not "username"
pwd
cd /
pwd
cd ~  # a shortcut to home, from anywhere
pwd
cd .  # '.' always means *this* directory
pwd
cd ..  # '..' always means *one directory up*
pwd
You should also notice the location changes in your prompt.
Absolute and Relative Paths
You can think of paths like addresses. You can tell your friend how to go to a particular store from where they are currently (a ‘relative’ path), or from the main Interstate Highway that everyone uses (in this case, the root of the filesystem, ‘/’ … this is an ‘absolute’ path). Both are valid. But absolute paths can’t be confused, because they always start off from the same place. Relative paths, on the other hand, could be totally wrong for your friend if you assume they’re somewhere they’re not. With this in mind, let’s try a few more:
cd ~ # let's start at home
*relative (start here, take two steps up, then down through share and workshop)
cd ../../share/workshop/
pwd
absolute (start at root, take steps)
cd /share/workshop/
pwd
Note that the shell can be picky about how you describe a directory, or what’s in a directory. The ls command lists a directory or file. The following two commands illustrate this difference, but just realize that you may have to experiment sometimes to get the behavior you want:
ls -l /share/workshop
Tells you about the /share/workshop directory itself
ls -l /share/workshop/
Tells you what’s in the /share/workshop directory
Now, because it can be a real pain to type out, or remember these long paths, we need to discuss …
Tab Completion
Using tab-completion is a must on the command line. A single
touch updates the timestamp on a file, here we use it to create three empty files.
touch one seven september
ls o
tab with no enter should complete to ‘one’, then enter
ls s
tab with no enter completes up to ‘se’ since that’s in common between seven and september. tab again and no enter, this second tab should cause listing of seven and september. type ‘v’ then tab and no enter now it’s unique to seven, and should complete to seven. enter runs ‘cat seven’ command.
I can’t overstate how useful tab completion is. You should get used to using it constantly. Watch experienced users type and they maniacally hit tab once or twice in between almost every character. You don’t have to go that far, of course, but get used to constantly getting feedback from hitting tab and you will save yourself a huge amount of typing and trying to remember weird directory and filenames.
CHALLENGE
After returning to your home directory (just enter ‘cd’ by itself), verify that the two following commands are equivalent (replacing ‘username’ with your actual username):
cd ../../home/username/
cd ../../../../../../../home/username/
Why are these very different-looking commands equivalent??
Create and Destroy
We already learned one command that will create a file, touch. Lets create a folder in /share/workshop for you to work in and then another directory cli. We will use the environment variable $USER, that is your username.
cd  # home again
echo $USER # echo to screen the contents of the variable $USER
mkdir /share/workshop/$USER
cd /share/workshop/$USER
mkdir tmp
cd tmp
echo 'Hello, world!' > first.txt
echo text then redirect (‘>’) to a file.
cat first.txt # 'cat' means 'concatenate'
why ‘concatenate’? try this:
cat first.txt first.txt first.txt > second.txt
cat second.txt
OK, let’s destroy what we just created:
cd ../
rmdir tmp  # 'rmdir' meands 'remove directory', but this shouldn't work!
rm tmp/first.txt
rm tmp/second.txt  # clear directory first
rmdir tmp  # should succeed now
So, ‘mkdir’ and ‘rmdir’ are used to create and destroy (empty) directories. ‘rm’ to remove files. To create a file can be as simple as using ‘echo’ and the ‘>’ (redirection) character to put text into a file. Even simpler is the ‘touch’ command.
touch newFile
ls -ltra  # look at the time listed for the file you just created
cat newFile  # it's empty!
sleep 60  # go grab some coffee
touch newFile
ls -ltra  # same time?
So ‘touch’ creates empty files, or updates the ‘last modified’ time. Note that the options on the ‘ls’ command you used here give you a Long listing, of All files, in Reverse Time order (l, a, r, t).
Piping and Redirection
Pipes (‘|’) allow commands to hand output to other commands, and redirection characters (‘>’ and ‘»’) allow you to put output into files.
cd /share/workshop/$USER
mkdir cli
cd cli/
echo 'first' > test.txt
cat test.txt
echo 'second' > test.txt
cat test.txt
echo 'third' >> test.txt
cat test.txt
The ‘>’ character redirects output of a command that would normally go to the screen instead into a specified file. ‘>’ replaces, ‘»’ appends.
cuts character one to three, from every line, from file ‘test.txt’
cut -c 1-3 test.txt
same thing, piping output of one command into input of another
cat test.txt | cut -c 1-3
pipes cat to cut to sort (-r means reverse order sort), and then grep searches for pattern (‘s’) matches.
cat test.txt | cut -c 1-3 | sort -r
cat test.txt | cut -c 1-3 | sort -r | grep s
This is a great way to build up a set of operations while inspecting the output of each step in turn. We’ll do more of this in a bit.
Compression and Archives
As file sizes get large, you’ll often see compressed files, or whole compressed folders.
gzip test.txt
cat test.txt.gz
Should now be binary, ‘zcat’ can be used to uncompress and cat
zcat test.txt.gz
To uncompress a file
gunzip -c test.txt.gz
The ‘-c’ leaves the original file alone, but dumps expanded output to screen
gunzip test.txt.gz # now the file should change back to uncompressed test.txt
Tape archives, or .tar files, are one way to compress entire folders and all contained folders into one file. When they’re further compressed they’re called ‘tarballs’. We can use wget (web get) and curl (Client URL) to retrieve files from the internet.
wget ftp://igenome:G3nom3s4u@ussd-ftp.illumina.com/PhiX/Illumina/RTA/PhiX_Illumina_RTA.tar.gz
OR
curl ftp://igenome:G3nom3s4u@ussd-ftp.illumina.com/PhiX/Illumina/RTA/PhiX_Illumina_RTA.tar.gz > PhiX_Illumina_RTA.tar.gz
The .tar.gz and .tgz are commonly used extensions for compressed tar files, when gzip compression is used. The application tar is used to uncompress .tar files
tar -xzvf PhiX_Illumina_RTA.tar.gz #
Here -x = extract, -z = use gzip/gunzip, -v = verbose (show each file in archive), -f filename
Note that, unlike Windows, linux does not depend on file extensions to determine file behavior. So you could name a tarball ‘fish.puppy’ and the extract command above should work just fine. The only thing that should be different is that tab-completion doesn’t work within the ‘tar’ command if it doesn’t see the ‘correct’ file extension.
Forced Removal
When you’re on the command line, there’s no ‘Recycle Bin’. Since we’ve expanded a whole directory tree, we need to be able to quickly remove a directory without clearing each subdirectory and using ‘rmdir’.
rm -rf PhiX
Here -r = recursively remove sub-directories, -f means force. We actually want to use those directories, so un-archive them again!
Obviously, be careful with ‘rm -rf’, there is no going back, if you delete something with rm, rmdir its gone!
BASH Wildcard Characters
When we want to specify or operate on sets of files all at once.
ls ?hiX/Illumina
list files in Illumina sub-directory of any directory ending in ‘hiX’
ls PhiX/Illumina/RTA/Sequence/*/*.fa
list all .fa files a few directories down. So, ‘?’ fills in for zero or one character, ‘*’ fills in for zero or more characters. find can be used to locate files of a server form.
find . -name "*.f*"
find . -name "*.f?"
how are this different from the previous command?
Quick Note About the Quote(s)
The quote characters “ and ‘ are different. In general, single quotes preserve the literal meaning of all characters between them. On the other hand, double quotes allow the shell to see what’s between them and make substitutions when appropriate. For example:
VRBL=someText
echo '$VRBL'
echo "$VRBL"
However, some commands try to be ‘smarter’ about this behavior, so it’s a little hard to predict what will happen in all cases. It’s safest to experiment first when planning a command that depends on quoting … list filenames first, instead of changing them, etc. Finally, the ‘backtic’ characters ` (same key - unSHIFTED - as the tilde ~) causes the shell to interpret what’s between them as a command, and return the result.
echo `$VRBL`  # tries to execute a command with the name *someText*
newVRBL=`echo $VRBL`
echo $newVRBL
Manipulation of a FASTA File
We just found the phiX-174 genome, so let’s copy it to our current directory so we can play with it:
cp ./PhiX/Illumina/RTA/Sequence/WholeGenomeFasta/genome.fa phix.fa
Note how we copied the ‘genome.fa’ file to a different name: ‘phix.fa’
wc -l phix.fa
count the number of lines in the file using ‘wc’ (word count) and parameter ‘-l’ (lines).
We can use the ‘grep’ command to search for matches to patterns. ‘grep’ comes from ‘globally search for a regular expression and print’.
grep -c '>' phix.fa
| Only one FASTA sequence entry, since only one header line (‘>gi | somethingsomething…’) |
cat phix.fa
This may not be useful for anything larger than a virus! Let’s look at start codon and 2 following:
grep --color "ATG......" phix.fa
’.’ characters are the single-character wildcards for grep
Use the –color ‘-o’ option to *only print the pattern matches, one per line
grep -o "ATG......" phix.fa
Use the ‘cut’ command with ‘-c’ to select characters 4-6, the second codon
grep --color -o "ATG......" phix.fa | cut -c4-6
‘sort’ the second codon sequences (default order is same as ASCII table; see ‘man ascii’)
grep --color -o "ATG......" phix.fa | cut -c4-6 | sort
Combine successive identical sequences, but count them (‘-c’ option)
grep --color -o "ATG......" phix.fa | cut -c4-6 | sort | uniq -c
Finally sort using only the 1st ‘field’ as a key (‘-k1,1’), in reverse numeric order (‘-rn’)
grep --color -o "ATG......" phix.fa | cut -c4-6 | sort | uniq -c | sort -rn -k1,1
… which gives us the most common codons first
This may not be a particularly useful thing to do with a genomic FASTA file, but it illustrates the process by which one can build up a string of operations, using pipes, in order to ask quantitative questions about sequence content. More generally than that, this process allows one to ask questions about files and file contents and the operating system, and verify at each step that the process so far is working as expected. The command line is, in this sense, really a modular workflow management system.
CHALLENGE
The commands above only find start codons on the forward strand. How would you find the most common first codons (after the ATG) on the reverse strand?
Symbolic Links
Since copying or even moving large files (like sequence data) around your filesystem may be impractical, we can use links to reference ‘distant’ files without duplicating the data in the files. Symbolic links are disposable pointers that refer to other files, but behave like the referenced files in commands.
ln -s PhiX/Illumina/RTA/Sequence/WholeGenomeFasta/genome.fa .
ls -ltrhaF  # notice the symbolic link pointing at its target
grep -c ">" genome.fa
STDOUT & STDERR
Programs can write to two separate output streams, ‘standard out’ (STDOUT), and ‘standard error’ (STDERR). The former is generally for direct output of a program, while the latter is supposed to be used for reporting problems. I’ve seen some bioinformatics tools use STDERR to report summary statistics about the output, but this is probably bad practice. Default behavior in a lot of cases is to dump both STDOUT and STDERR to the screen, unless you specify otherwise. In order to nail down what goes where, and record it for posterity:
wc -c genome.fa 1> chars.txt 2> any.err
the 1st output, STDOUT, goes to ‘chars.txt’
the 2nd output, STDERR, goes to ‘any.err’
cat chars.txt
Contains the character count of the file genome.fa
cat any.err
Empty since no errors occured.
Saving STDOUT is pretty routine (you want your results, yes?), but remember that explicitly saving STDERR is important on a remote server, since you may not directly see the ‘screen’ when you’re running jobs.
Paste Command
The paste command is useful in creating tables.
echo 'WT1' > b
echo 'WT2' >> b
echo 'control1' >> b
echo 'control2' >> b
cat b
Now we can number our four samples to conveniently refer to them in order
for i in {1..4}; do echo $i >> a; done
cat a
paste a b > c
cat c
Running in the Background
Sometimes it’s useful to continue working on the command line, even after you’ve executed a command that’s going to take a while to finish. Normally this command would occupy the shell, and prevent you from typing in commands and receiving results. But we can ‘put jobs in the background’ so that they don’t occupy your shell directly:
sleep 1000000
Cntr-Z to pause (stop) the command
bg
To restart the last command in the background
‘^Z’ first suspends the sleep command. Then, ‘bg’ resumes running that command in the background, so that it doesn’t occupy the terminal. The output of the ‘bg’ command tells you that you have one command running in the background. You could start more, suspend them, then resume them in the background, and query what background jobs are running or are suspended, not running:
jobs
[1]+ Running sleep 1000000 &
We can also start a job in the background in one step, without having to suspend then resume it, using the ‘&’ character at the end of the command:
sleep 5000000 &
If we want to delete these jobs for any reason, we can kill them using the numbering that ‘jobs’ reveals:
jobs
# [1]-  Running                 sleep 1000000 &
# [2]+  Running                 sleep 5000000 &
kill %1
jobs
# [1]-  Terminated              sleep 1000000
# [2]+  Running                 sleep 5000000 &
kill %2
jobs
# [2]+  Terminated              sleep 5000000
Finally, the ‘nohup’ command (from ‘no hangup’!) makes jobs extra resistant to lost connections or terminal problems. In other words, even jobs running in the background can be terminated if one’s shell dies. ‘nohup’ separates the running job from the shell, so it’ll keep running until it dies or is actively killed by you.
nohup sleep 1000000 &
[1] 34993
username@c4-0:~/CLB$ nohup: ignoring input and appending output to nohup.out
jobs
[1]+ Running nohup sleep 1000000 &
output is dumped into the ‘nohup.out’ file unless specifically redirected in your command
kill %1
If you used bg to send a process to the background you can use ‘disown’ to “nohup” the process
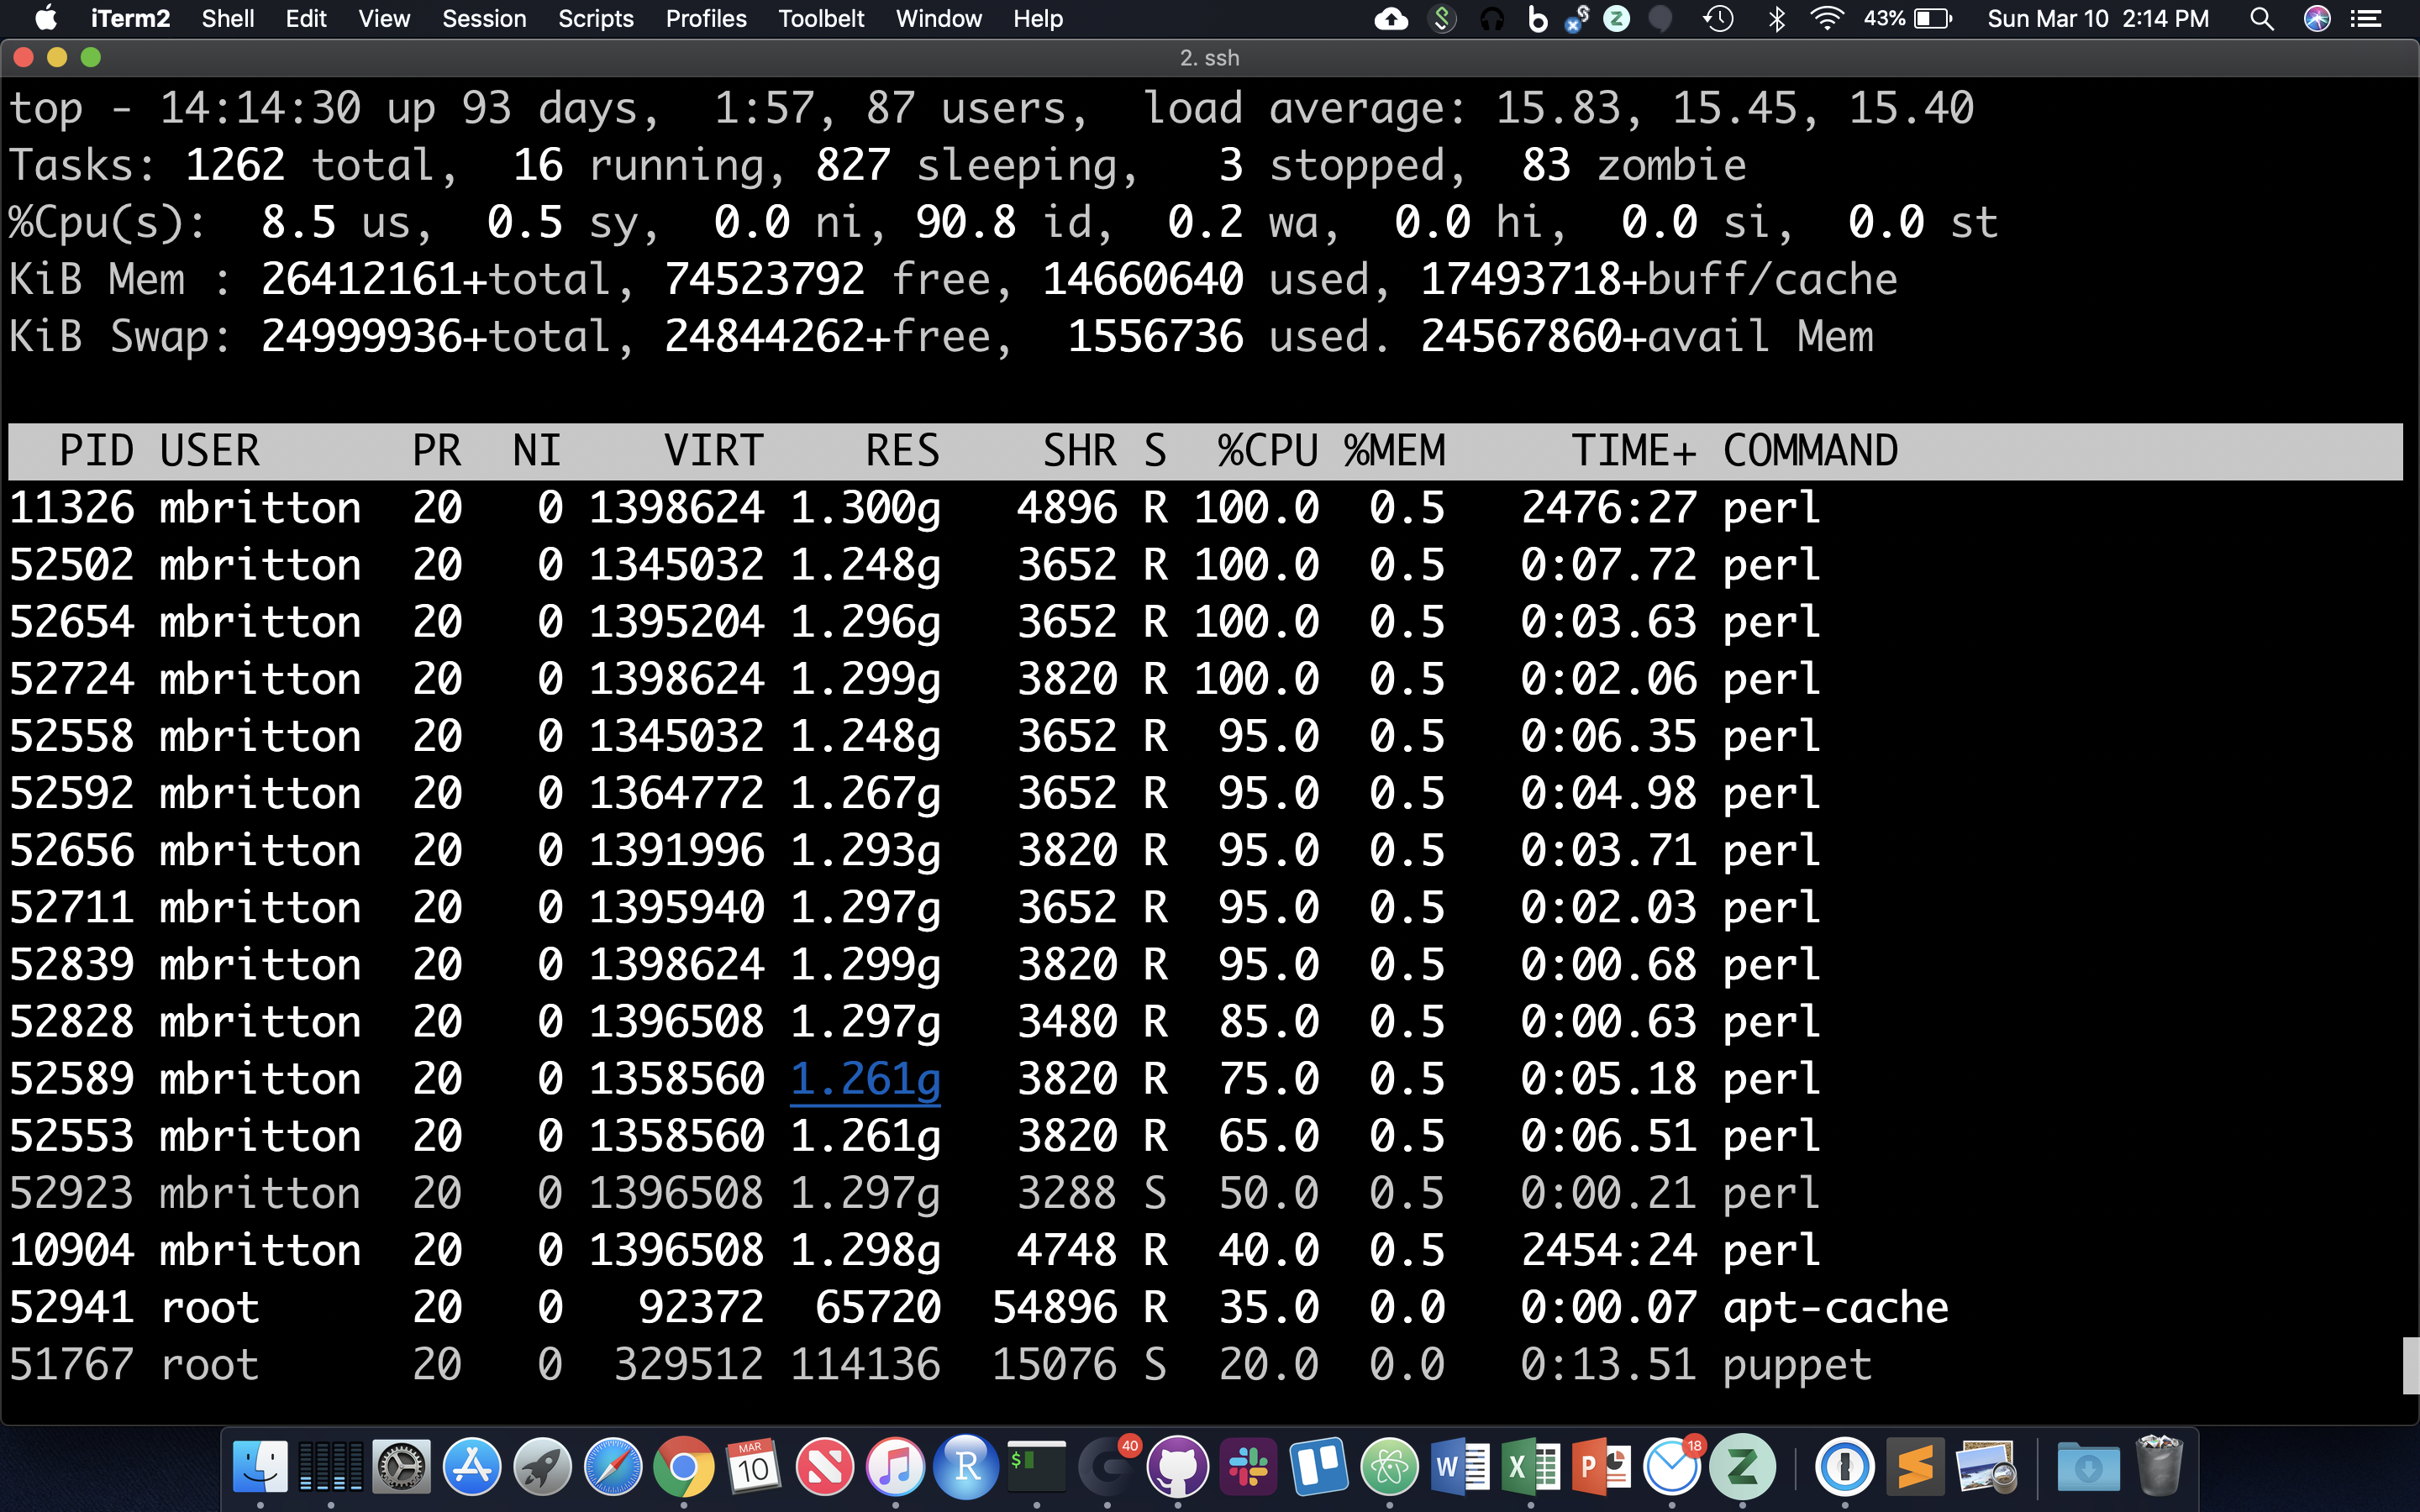
Table of Processes (top)
The ‘top’ command prints a self-updating table of running processes and system stats. Use ‘q’ to exit top, ‘z’ to toggle better color contrast, ‘M’ to sort by memory use, ‘P’ to sort by processor use, and ‘c’ to toggle display of the full commands. Hit ‘1’ to toggle display of all processors, and hit ‘u’ followed by typing in a username in order to only show processes (jobs) owned by that user.
Shell Scripts, File Permissions
Often it’s useful to define a whole string of commands to run on some input, so that (1) you can be sure you’re running the same commands on all data, and (2) so you don’t have to type the same commands in over and over! Let’s use the ‘nano’ text editor program that’s pretty reliably installed on most linux systems.
nano test.sh
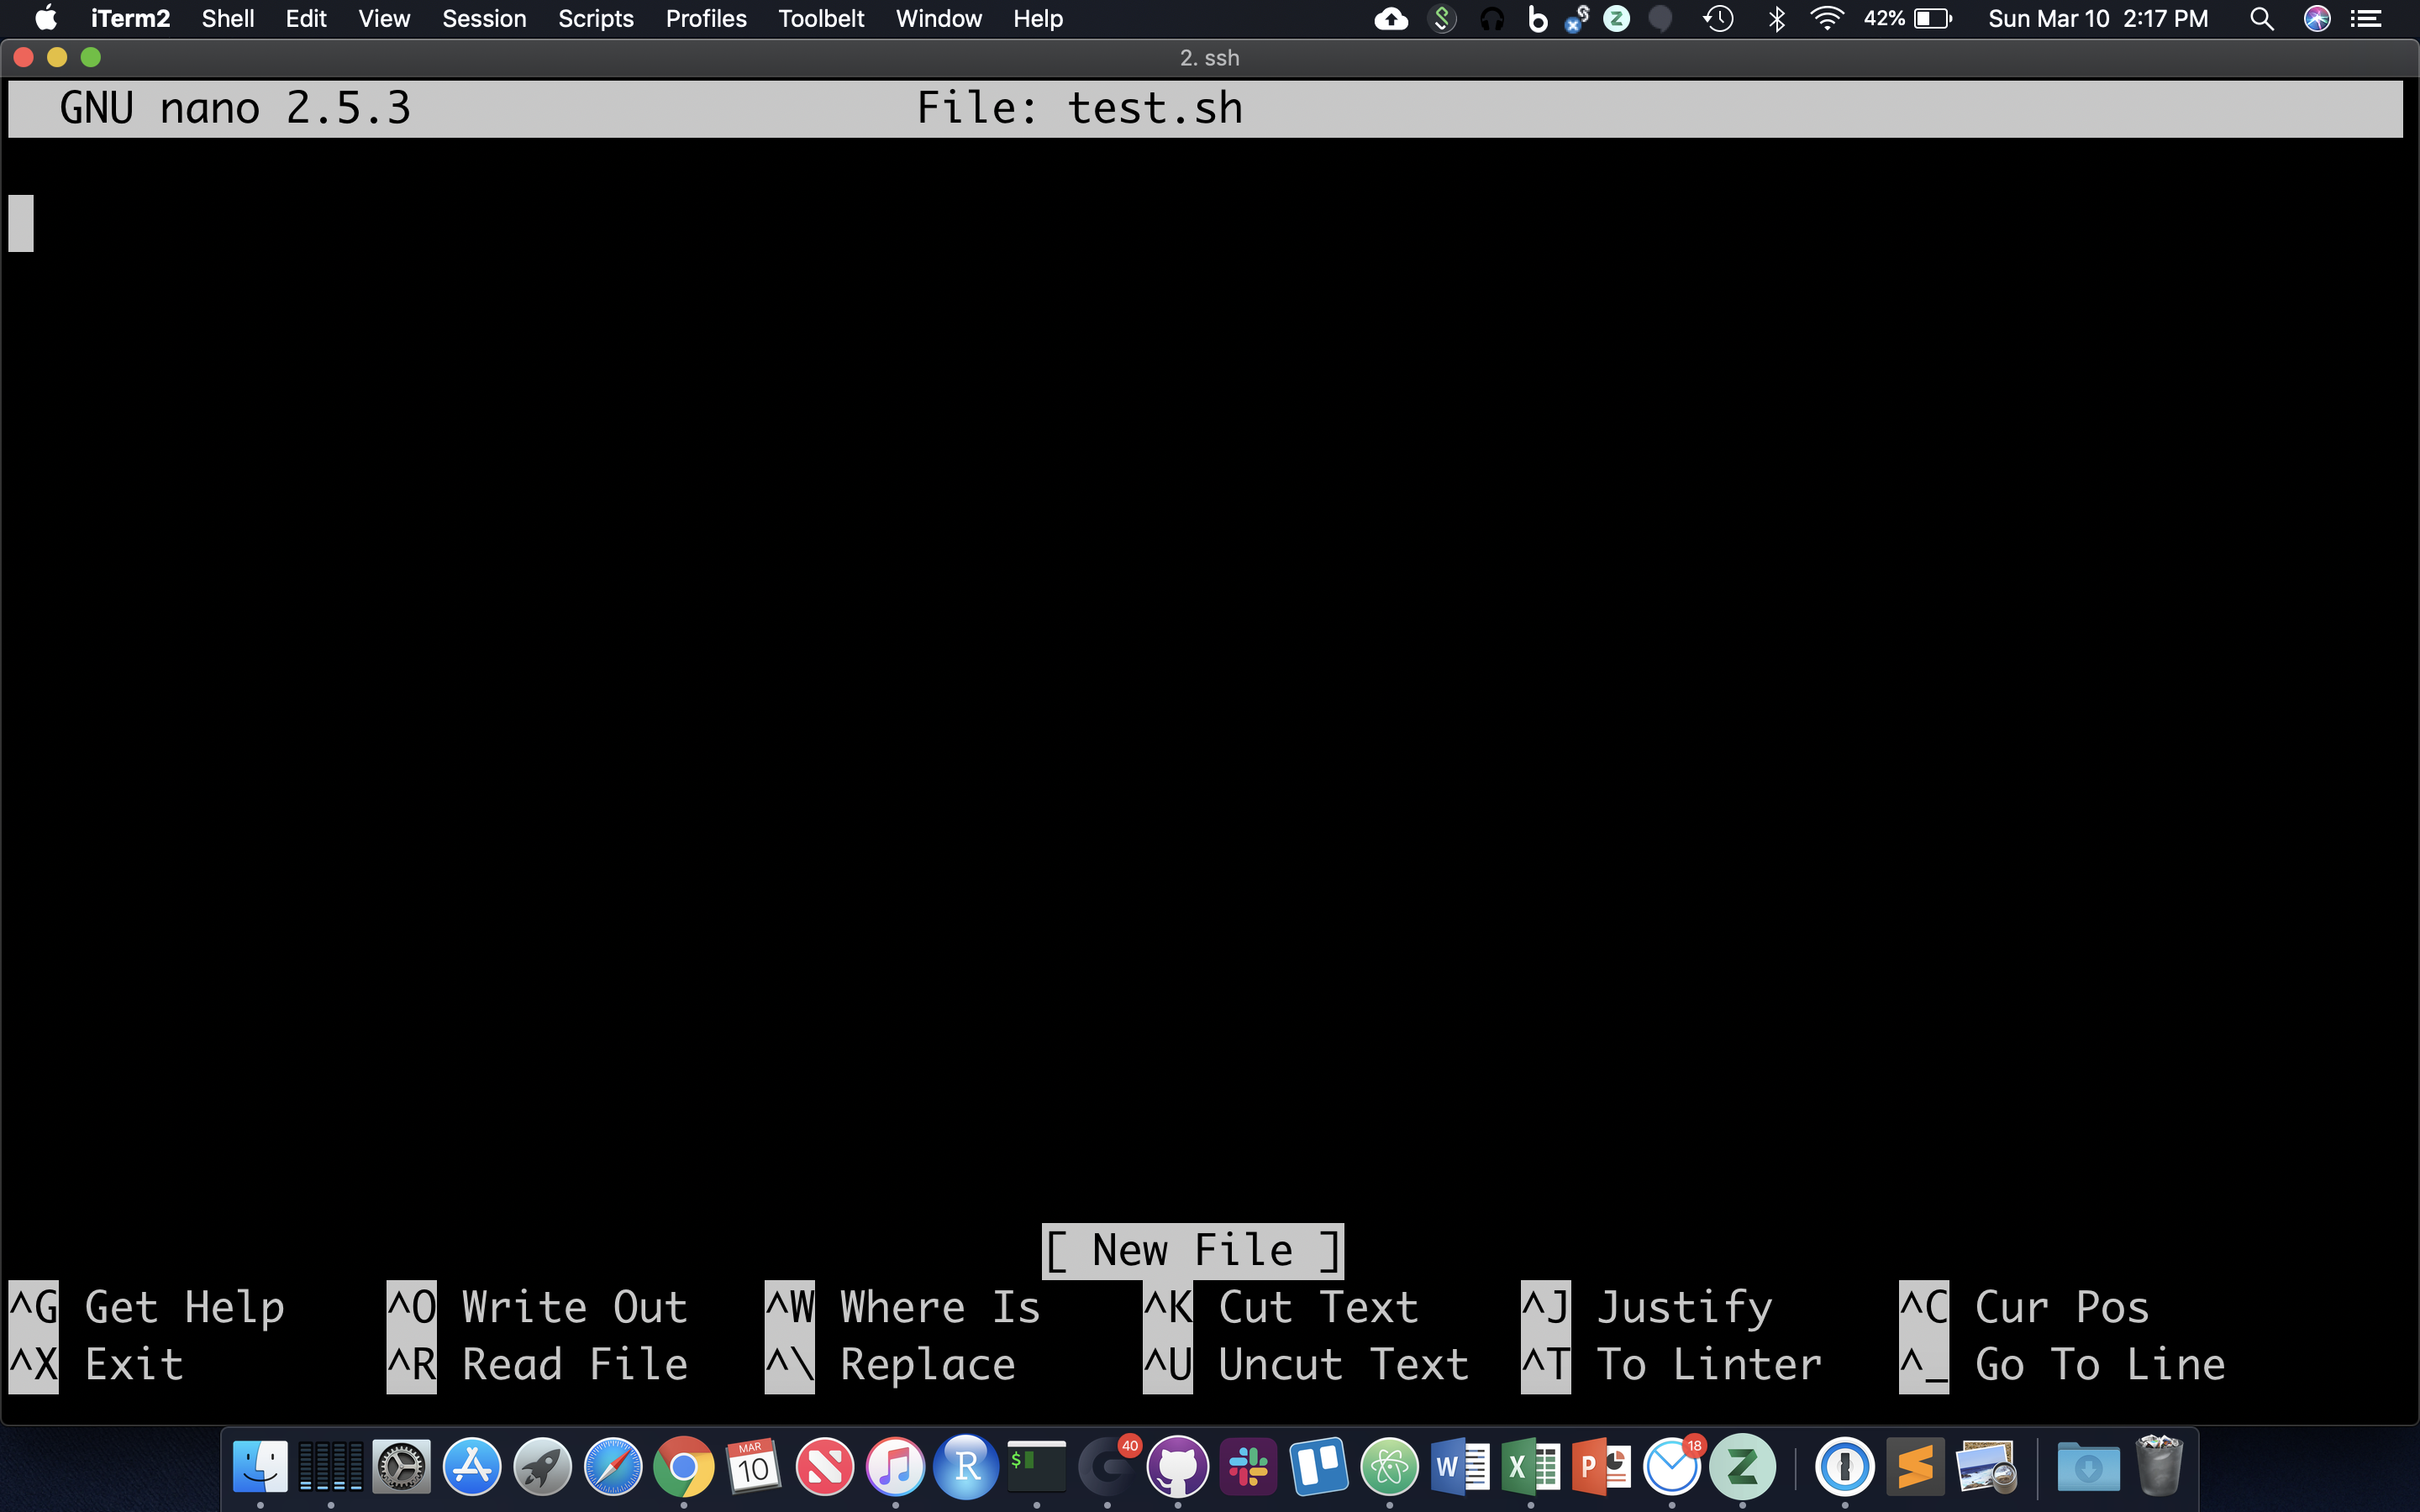
nano now occupies the whole screen; see commands at the bottom type/paste in the following … (note that ‘#!’ is an interpreted command to the shell, not a comment)
#!/bin/bash
grep -o . $1 | \
    sort | \
    uniq -c | \
    sort -rn -k1,1
Cntrl-X top exit first saving the document. Follow the instruction at the bottom of the screen
Note that ‘$1’ means ‘the value of the 1st argument to the shell script’ … in other words, the text that follows the shell script name when we run it (see below).
Though there are ways to run the commands in test.sh right now, it’s generally useful to give yourself (and others) ‘execute’ permissions for test.sh, really making it a shell script. Note the characters in the first (left-most) field of the file listing:
ls -lh test.sh
-rw-rw-r-- 1 msettles workshop 90 Mar 10 14:19 test.sh
The first ‘-‘ becomes a ‘d’ if the ‘file’ is actually a directory. The next three characters represent read, write, and execute permissions for the file owner (you), followed by three characters for users in the owner’s group, followed by three characters for all other users. Run the ‘chmod’ command to change permissions for the ‘test.sh’ file, adding execute permissions (‘+x’) for the user (you) and your group (‘ug’):
chmod ug+x test.sh
ls -lh test.sh
-rwxr-xr-- 1 jfass biocore 79 Aug 19 15:05 test.sh*
OK! So let’s run this script, feeding it the phiX genome. When we put the genome file 1st after the name of the script, this filename becomes variable ‘1’, which the script can access by specifying ‘$1’. We have to provide a relative reference to the script ‘./’ because its not our our “PATH”.
./test.sh genome.fa
msettles@tadpole:/share/workshop/msettles/cli$ ./test.sh genome.fa
    1686 T
    1292 A
    1253 G
    1155 C
       1 x
       1 p
       1 i
       1 h
       1 >
The script’s grep command splits out every character in the file on a separate line, then sorts them so it can count the occurrences of every unique character and show the most frequent characters first … a quick and dirty way to get at GC content.