
Starting a Shiny Server Instance from the Preconfigured Image
Keith Mitchell (kgmitchell@ucdavis.edu)
A few general notes:
- be sure Adam has granted you an IAM account on the UC Davis Bioinformatics AWS account.
- Do not nuke the Zulip instances!
- The following has been adapted from:
- https://towardsdatascience.com/how-to-host-a-r-shiny-app-on-aws-cloud-in-7-simple-steps-5595e7885722
Setting up an AWS account for yourself
- For the first year of your account being active AWS offers tons of free, cool services! One of which is a
micro EC2 instance which might be enough for some datasets. A medium, large instance run about 30$, 60$ per month.
- Here is more info on the pricing: https://aws.amazon.com/ec2/pricing/
How to prepare the instance for a client:
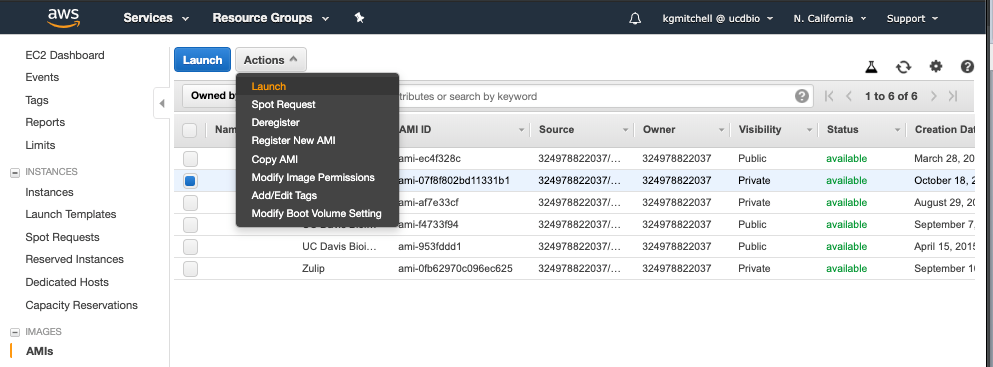
- Go to the AWS AMI’s (Amazon Machine Images). Select the Rshiny Server Image. Go to Actions>Launch
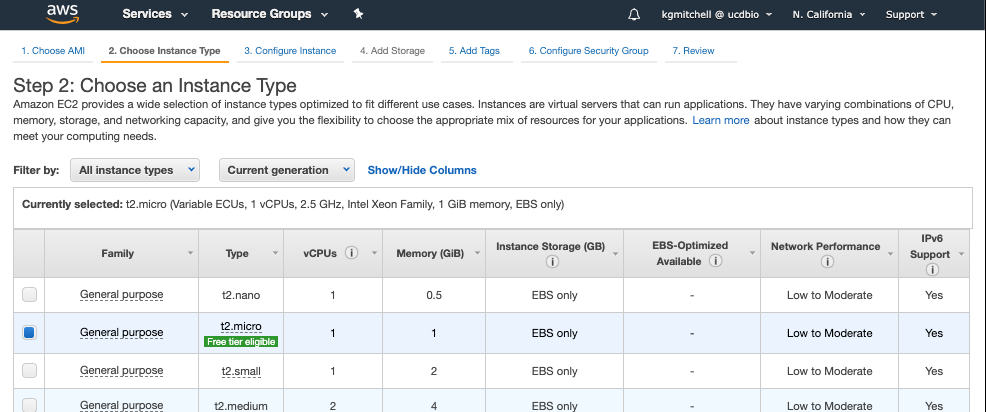
- Next Choose and Instance Type. This will vary in general based on the size of the data you are attempting to analyze.
In general it is advised to start with a smaller instance and then move up from there if necessary.
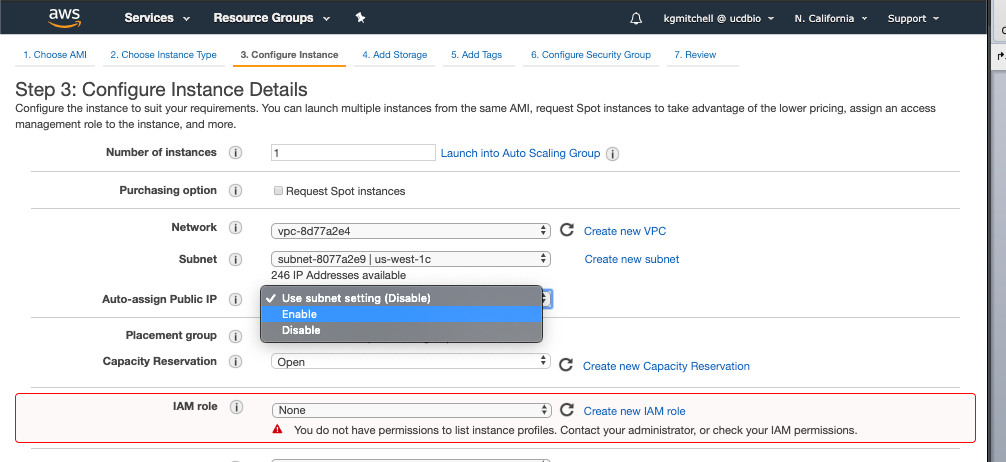
- Next Configure the Instance Details. The main step here is to set the “Auto-assign Public IP” to enable.
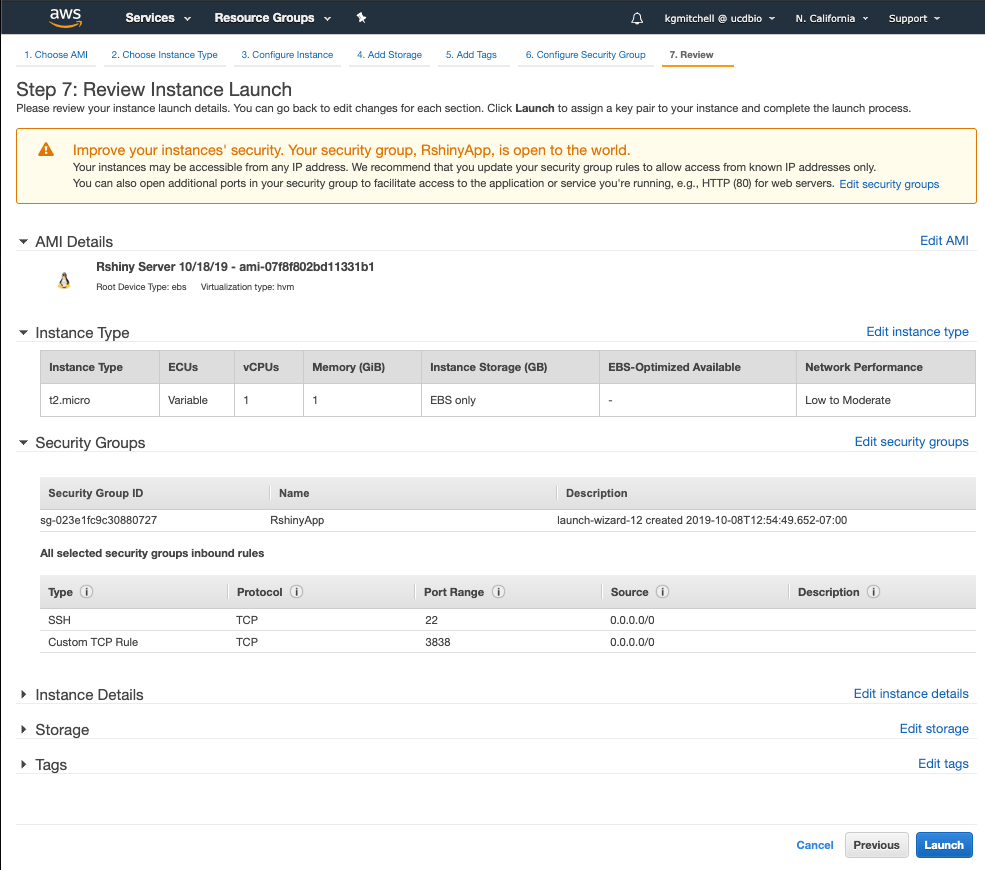
- Keep clicking the bottom right button, “Next: Configure Security Group” until you get to “Step 6: Configure Security Group”
- At step 6, select the Rshiny App security group.

- Finally launch the instance. (Bottom right hand quarter)
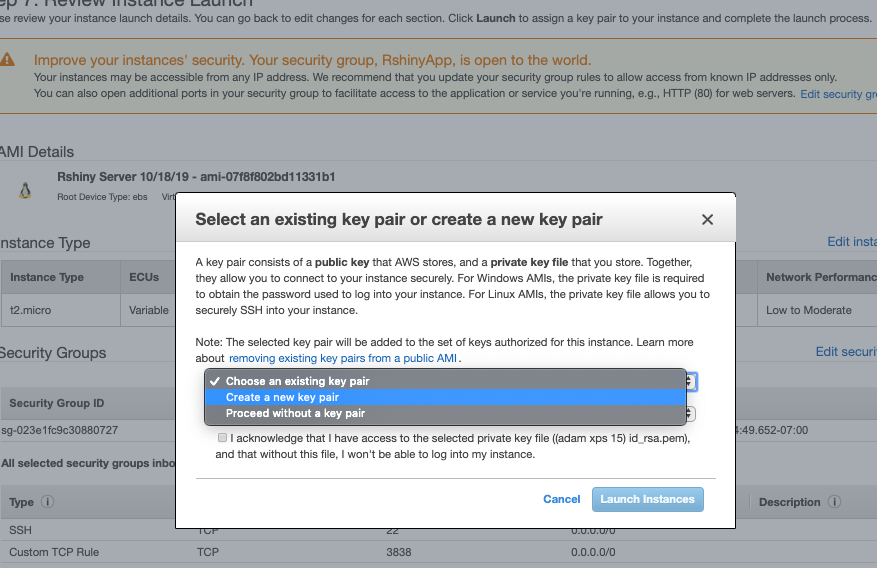
- Select an existing key pair or create a new key pair is the final step for starting the instance.
Choose “Create a new key pair” and give the key a useful name, here we will use “tutorial”.
- Move the downloaded key to
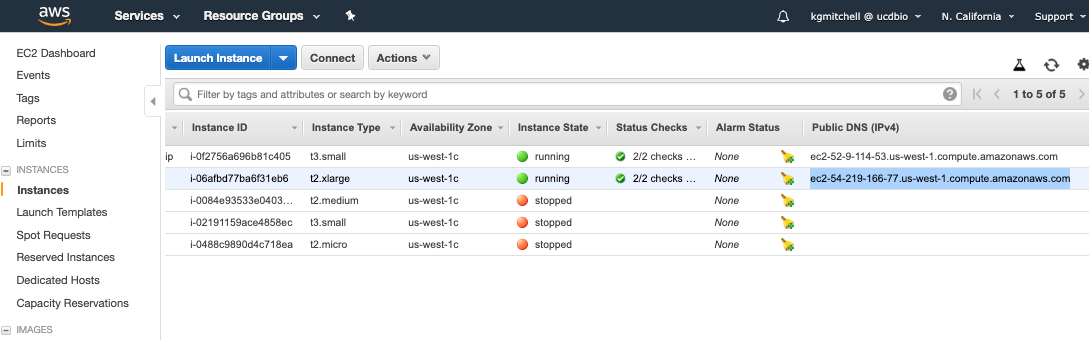
~/.ssh/viamv ~/Downloads/tutorial.pem ~/.ssh/ chmod 700 ~/.ssh/tutorial.pem- Get the connection to the instance seen highlighted below “ec2-…….amazonaws.com”
- Run the following command to upload the “experiment_merged.Rdata” object to the app:
scp -i ~/.ssh/tutorial.pem ec2-54-219-166-77.us-west-1.compute.amazonaws.com:/srv/shiny-server/scRNA_shiny_app/ ~/Desktop/experiment_merged.rds
- Replace the green section with your Public IV4 DNS address from the instance that was created and used in the previous step.
- http://ec2-54-219-166-77.us-west-1.compute.amazonaws.com:3838/scRNA_shiny_app/
- If there are problems with this link do the following:
- SSH into the server.
ssh -i ~/.ssh/tutorial.key ec2-54-219-166-77.us-west-1.compute.amazonaws.com
- Restart the shiny service.
sudo systemctl restart shiny-server.service
- SSH into the server.
- Memory issues?
- The default memory limit for R on the instance has caused me some problems in the app and it can be tricky to debug.
- The following link was a solution for this issue but feel free to reach out if you have any other issues in regards to this.
- https://stackoverflow.com/questions/1395229/increasing-or-decreasing-the-memory-available-to-r-processes
- You can increase the default using this command,
memory.limit(size=2500), where the size is in MB. - Or you can check the amount of available memory using
memory.limit()